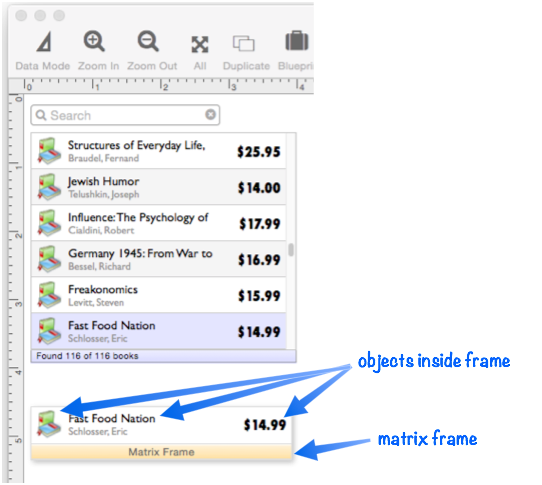
Unlike most other objects, a Matrix Object is not completely self contained – it requires a template that tells Panorama what to draw within each matrix cell. This template consists of Panorama objects enclosed within an object you designate as the frame object. We call the object a frame object because it surrounds the objects inside, just like a picture frame. Any object that is inside the frame object will automatically appear inside the cells of the matrix. The frame is usually placed off to the side or below, somewhere where it will not normally be visible.
Automatically Creating the Matrix Frame
Usually the easiest way to create a matrix frame is to let Panorama create the frame object for you. Make sure that the matrix cell dimensions are set up, then press the Create Frame Object button.
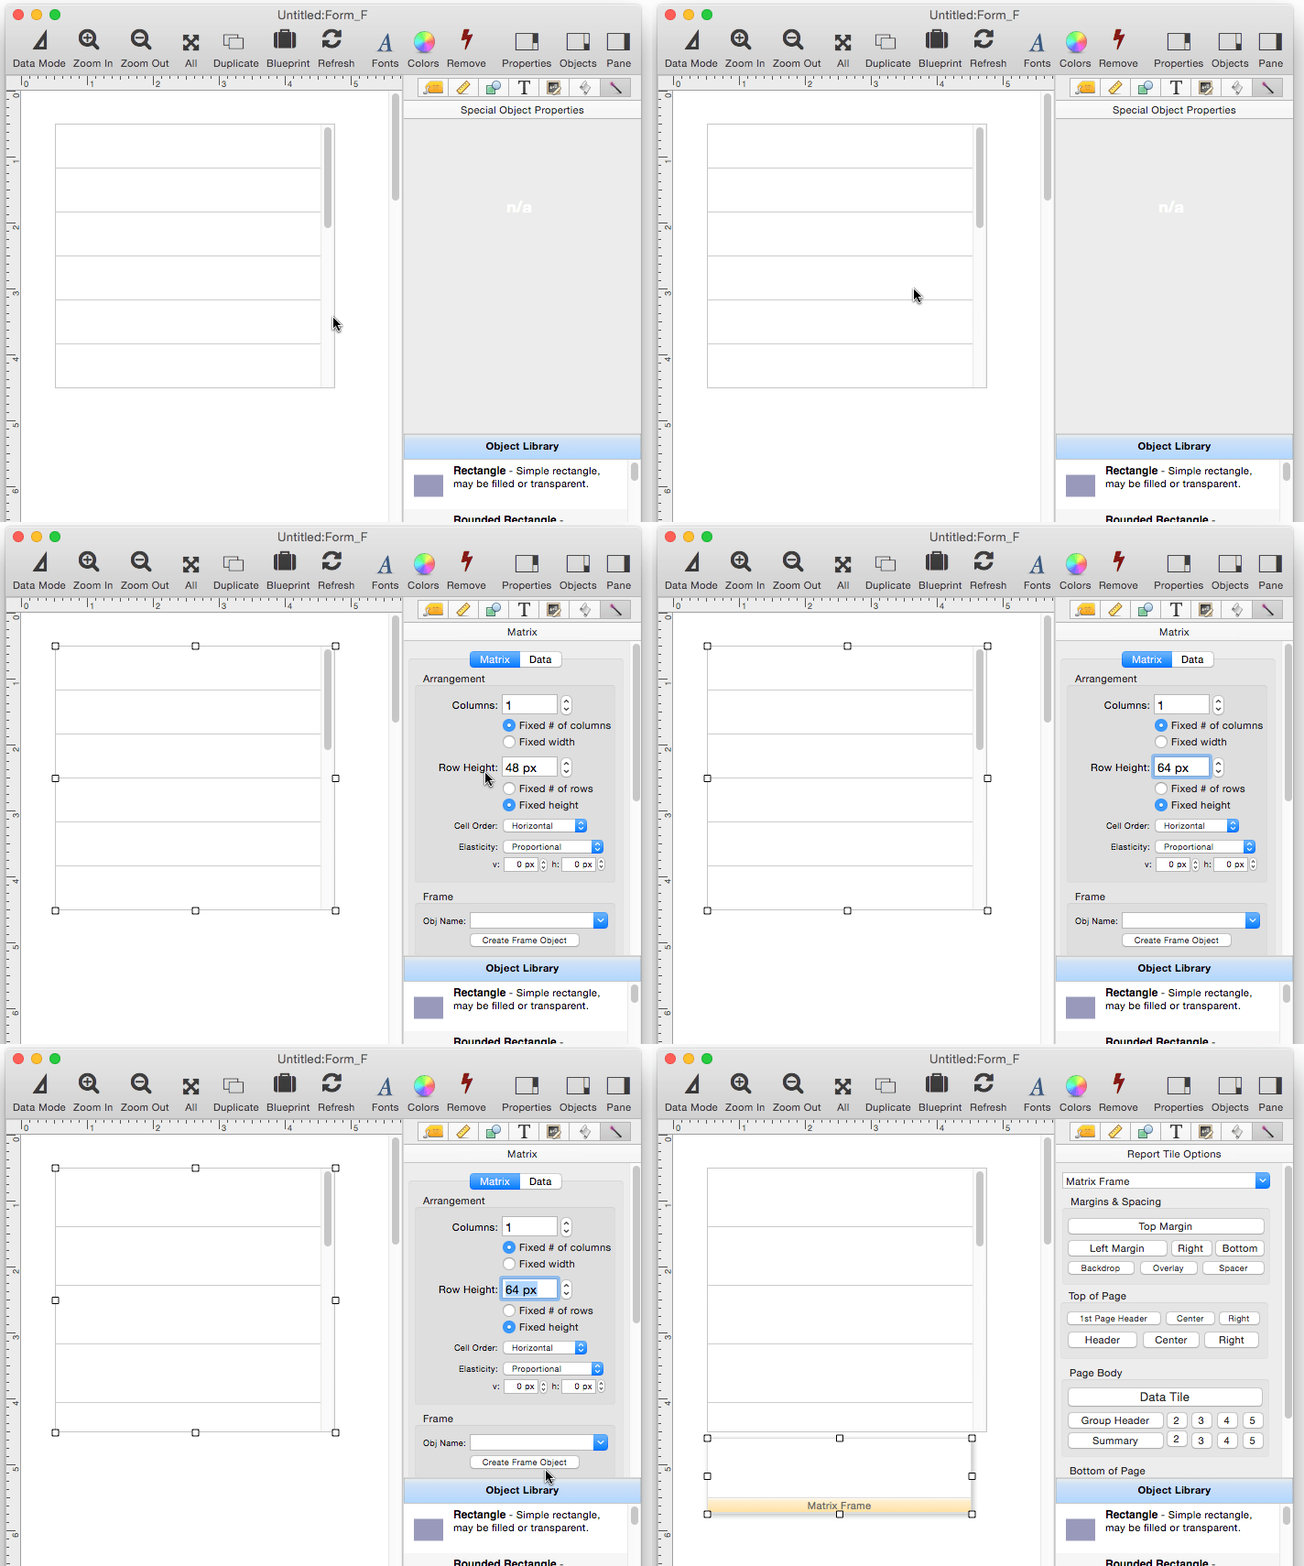
The frame object is created just below the matrix object, but you can move it to any other spot on the form (though it should not overlap with the matrix object itself).
Manually Creating the Matrix Frame
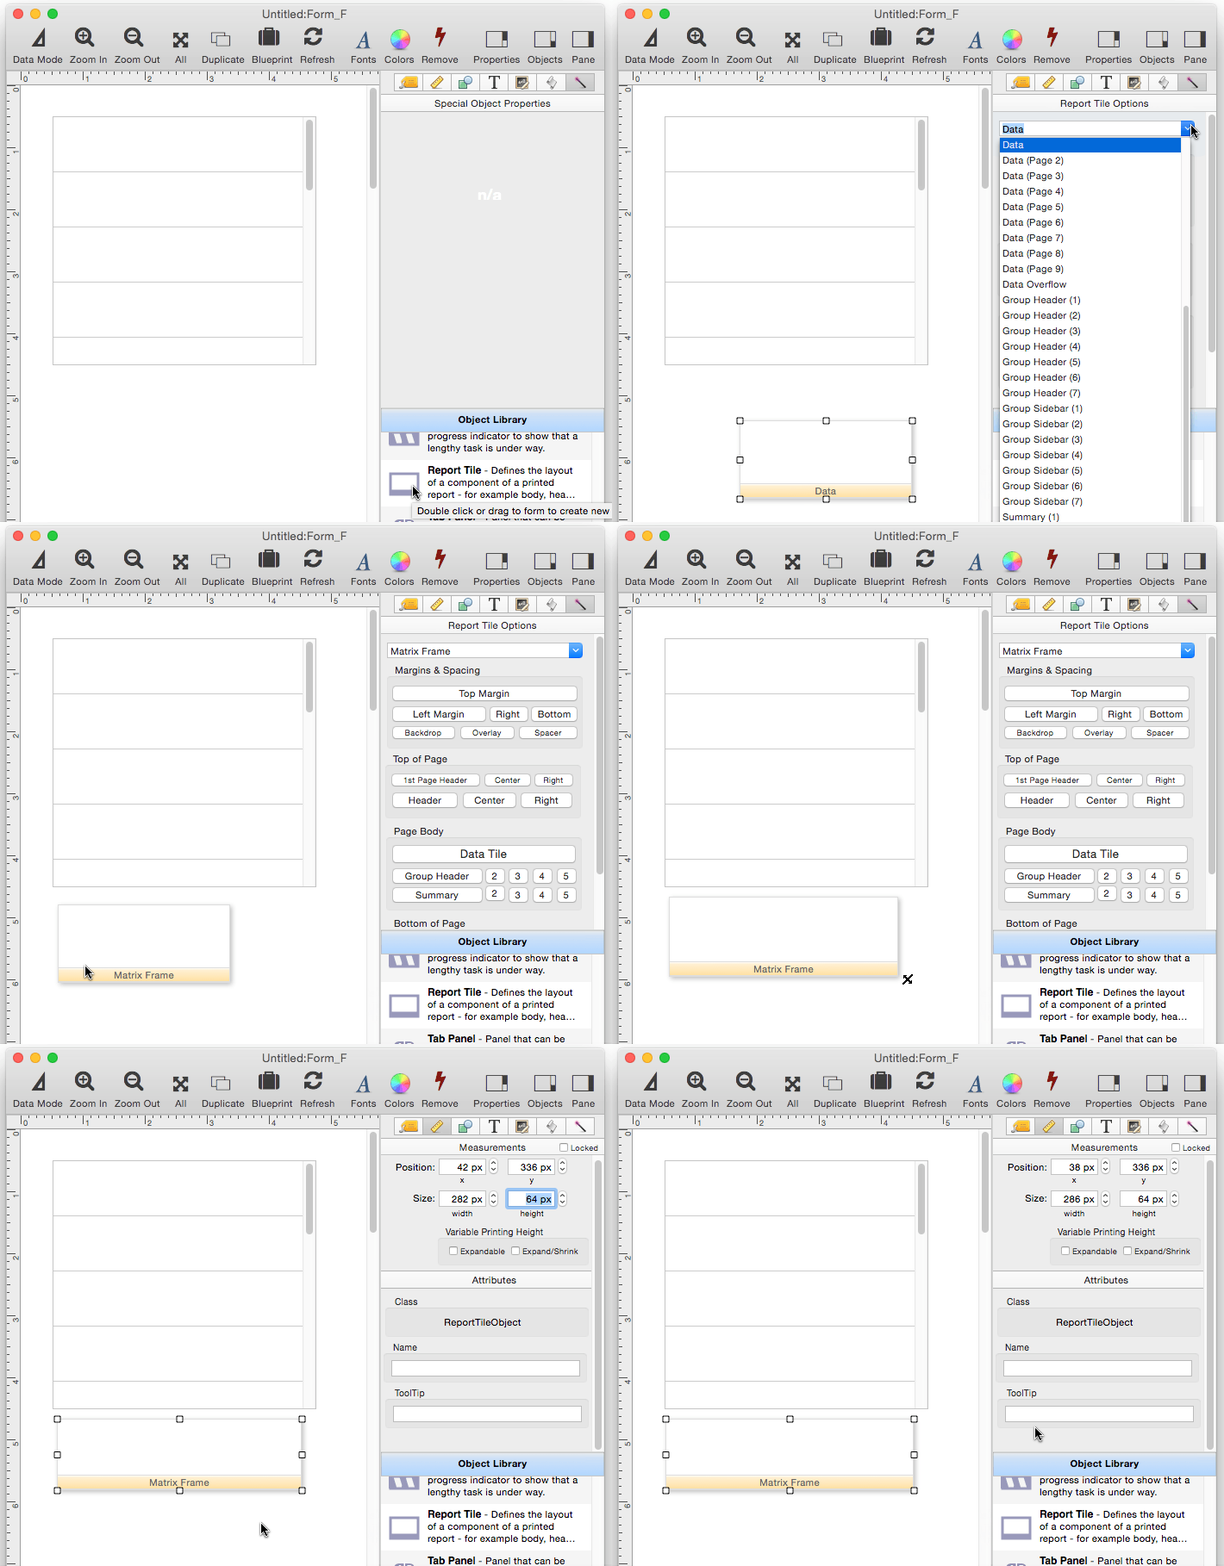
It’s possible to manually create the frame, using the Report Tile Object tool. When you do this, you have to manually set the size of the object, as shown here. This is kind of a pain, so why not let Panorama create the object for you, as described above?
Placing Objects in the Matrix Frame
In the last section, the formula for the matrix data was set up. Even though the formula is now set up, there is no data visible in the matrix. To make the data visible, one or more objects must be placed in the Matrix Frame, for example a Text Display Object like this.
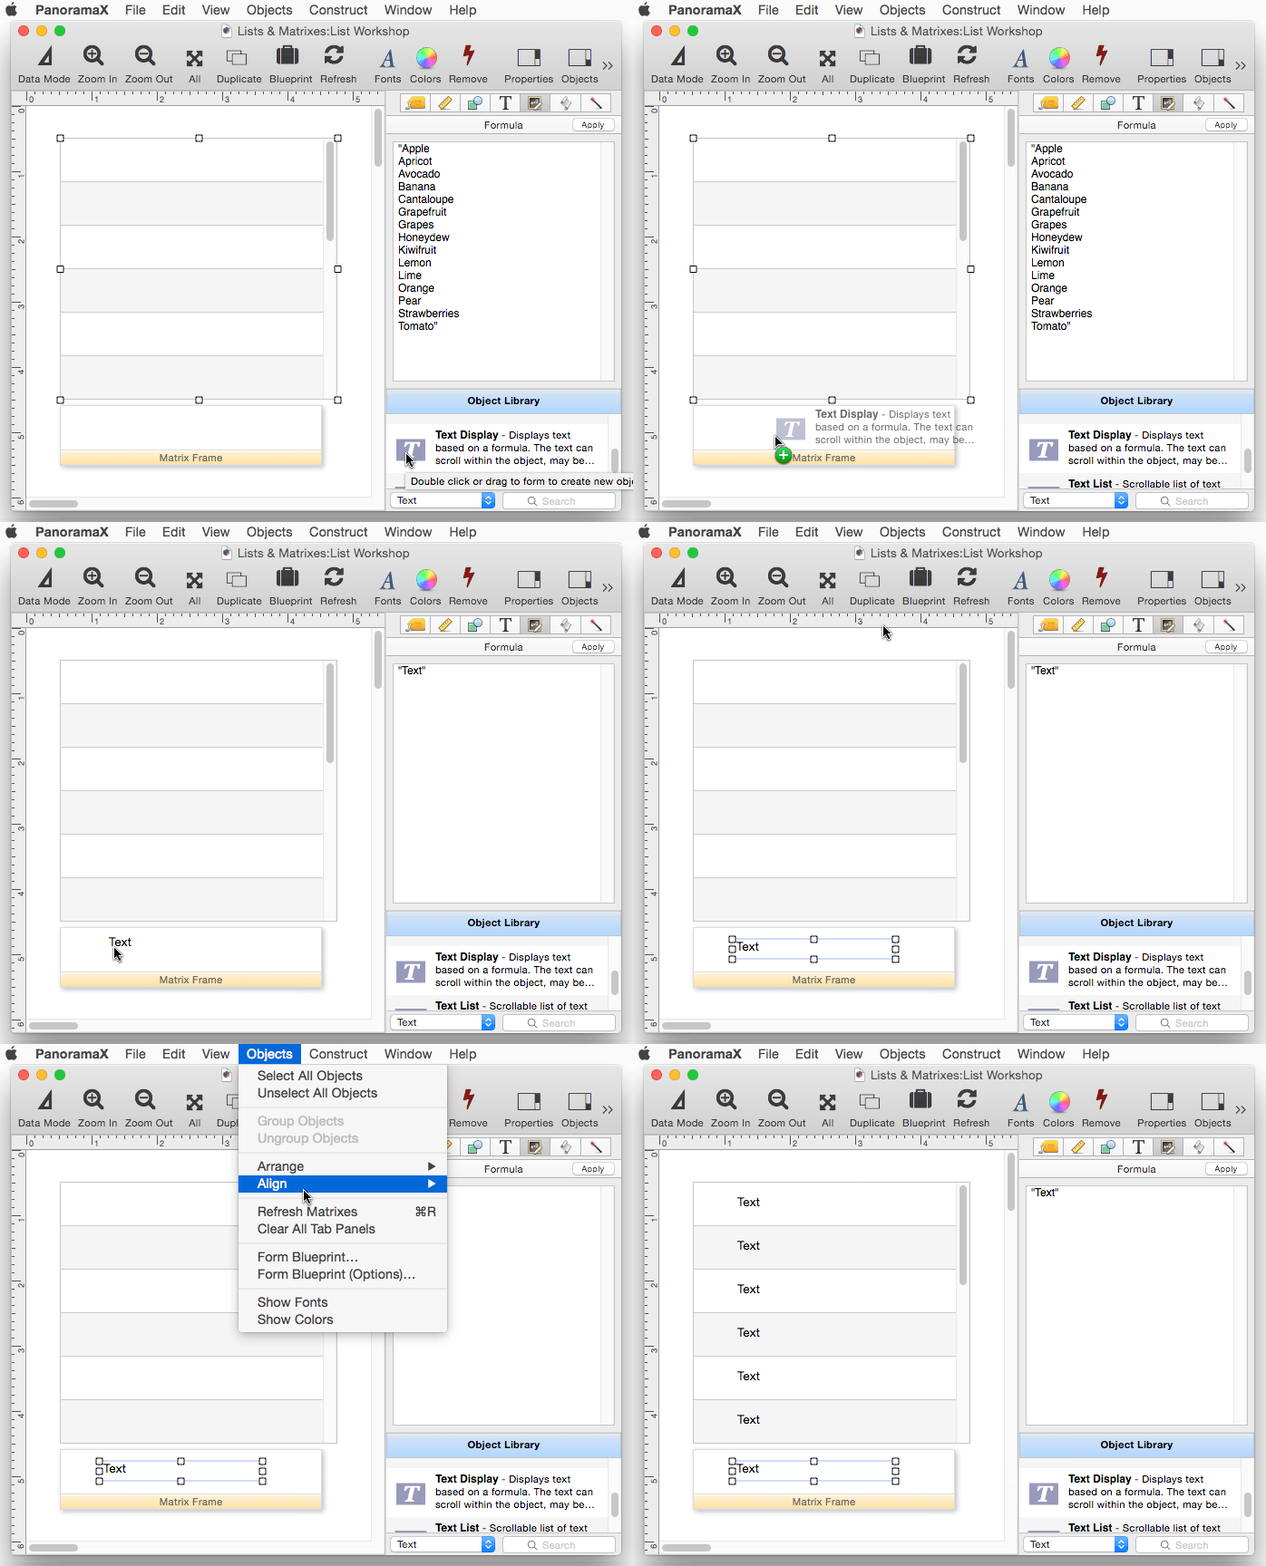
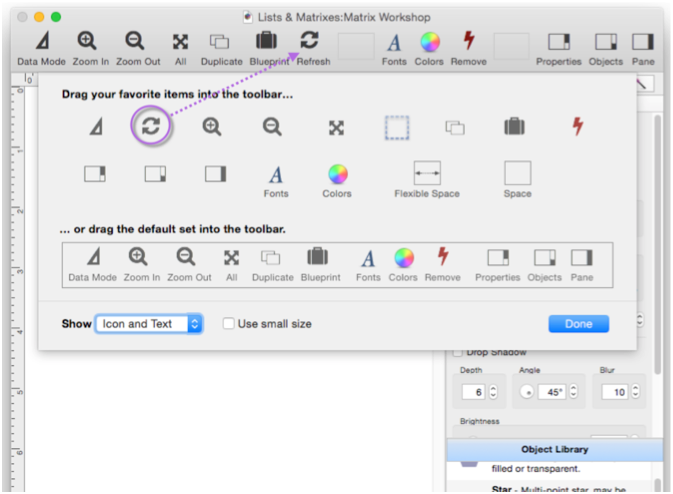
As you can see in the movie above, simply placing an object in the frame isn’t enough. To update the matrix itself, you have to choose Objects>Refresh Matrixes. This updates any Matrix Objects on the form to reflect the contents of the Matrix Frame. When working with matrixes, you’ll probably need to refresh a lot. To make this easier, you can add the Refresh tool to the toolbar – choose Window>Customize Toolbar…, then drag the Refresh tool into the toolbar.
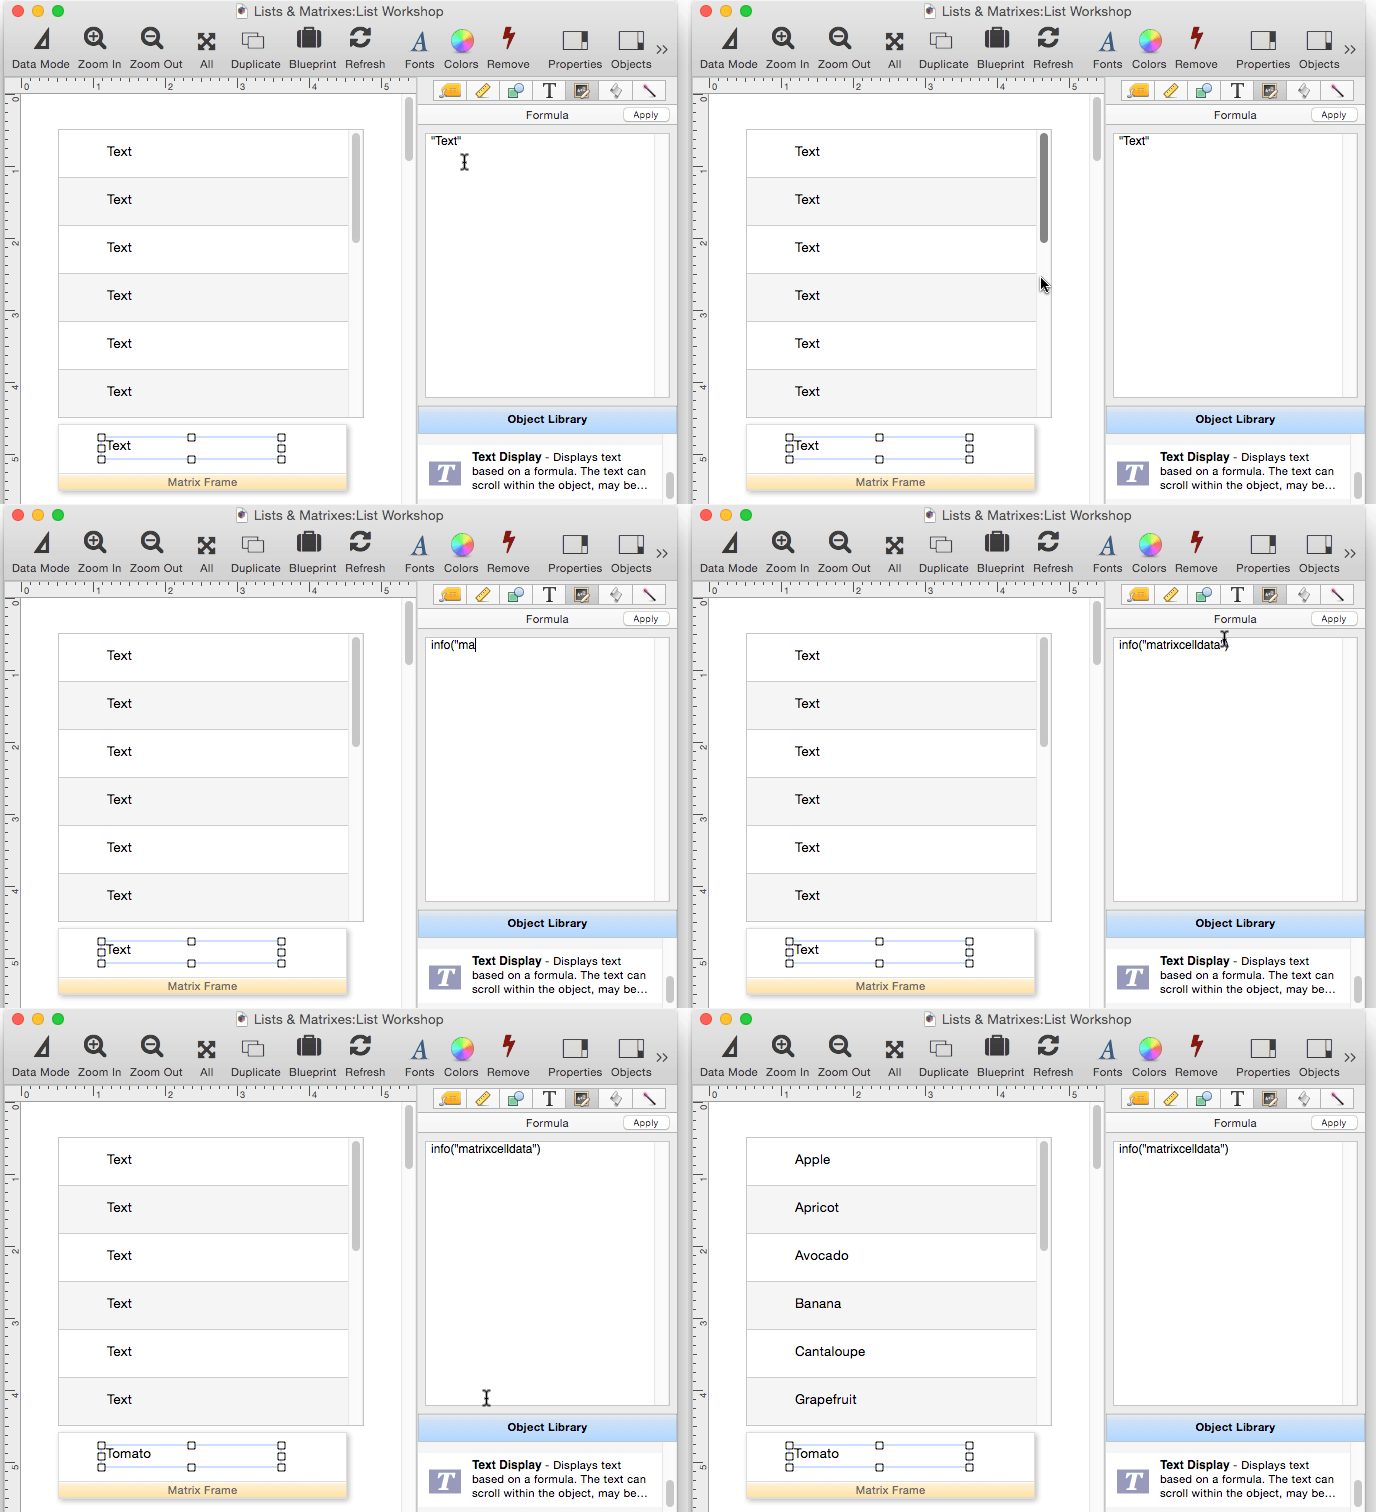
A moment ago, I placed a Text Display Object object in the matrix frame. However, I didn’t fully set up this object, so it is only displaying the word Text instead of the actual data. To display the actual matrix data, the formula needs to use the info(“matrixcelldata”) function, as shown here. Once this function is entered, I simply press the *Refresh tool and the data appears in the matrix.
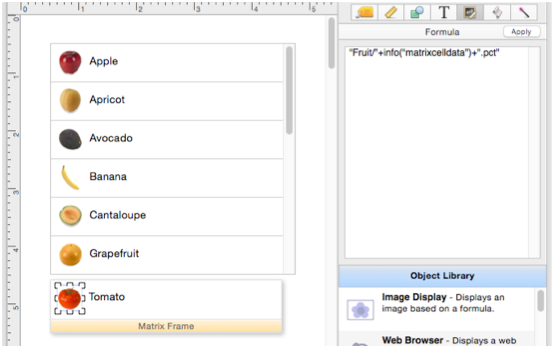
The info(“matrixcelldata”) function can be used in any type of object that takes a formula. In this example, an Image Display Object has been added (for this to work, there must be a folder named Fruit in the same folder as the database that contains the images of various types of fruit).
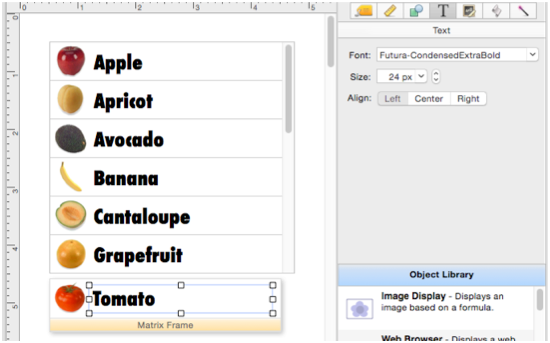
The beauty of the Matrix Object is that you can customize the graphics in the Matrix Frame any way you want – any arrangement, fonts, sizes, images, etc. Just remember than whenever you make a change you need to refresh to see that change in the matrix itself.
Using Multiple Matrix Objects on a Single Form
If there is more than one matrix object on a form, you’ll also need more than one matrix frame. But in that case, how will Panorama know which frame goes with which object? To keep everything straight, you must give each matrix frame a name, and then specify that name in the matrix object.
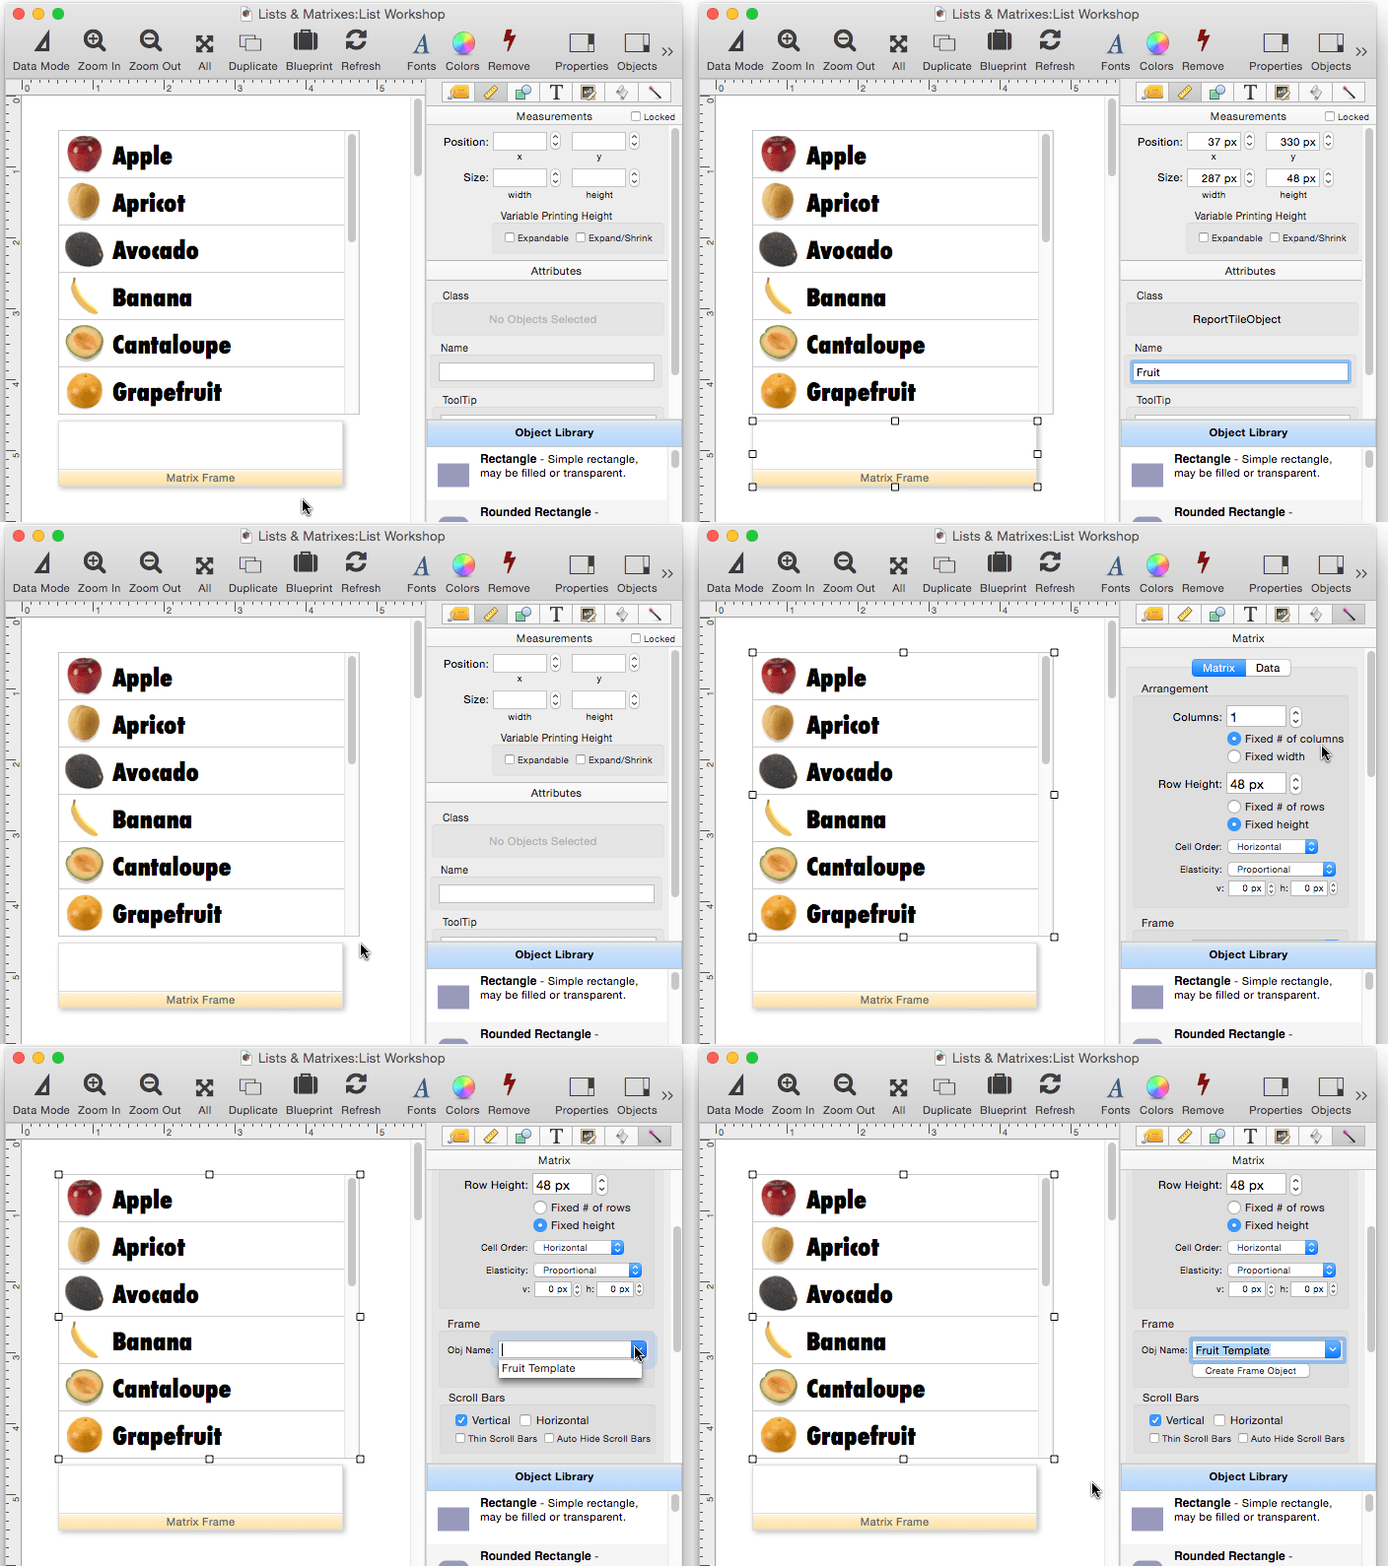
When the frame and matrix are linked by name like this, the frame object doesn’t have to be a report tile – it can be any kind of object. (In Panorama 6 and earlier versions, this method of linking the frame and matrix by name was the only way to do it.)
Hiding the Matrix Frame
The matrix frame is essential to the operation and appearance of a matrix object, but you probably don’t want to look at it. Usually you want the matrix frame to be “backstage”, the “man behind the curtain”. Fortunately, you can move the matrix frame out of the way. Just select the frame and all of the objects inside it, and move them anywhere else in the form. They don’t have to be visible, you can move them far, far away. Of course if you move them too far, it will be inconvenient for you to make modifications, but Panorama doesn’t care.
If you really want to hide the frame, Panorama X allows you to actually move the frame to another form. This form doesn’t have to be open or visible, though it does have to be in the same database. To do this, open the blueprint for the Matrix Object and type in the name of the form that contains the matrix frame. Of course, don’t forget to move the frame object and the objects inside it to this other form, usually using copy and paste. In this illustration I’ve faded the matrix frame to highlight that it really needs to be moved to the other form.
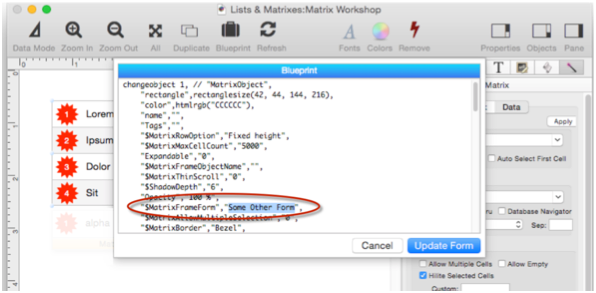
This technique is especially handy when using a matrix inside a Tab Panel Object.
See Also
- Displaying Data in a Grid -- fundamentals of displaying data in a grid (Text List/Matrix).
- Matrix Clicking -- handling clicks in a Matrix Object.
- Matrix Constructor -- quickly creating a Matrix Object from a template.
- Matrix Database Integration -- synchronizing a Matrix Object with a database.
- Matrix Geometry -- customizing the size and geometry of Matrix Object elements.
- Matrix Header and Horizontal Scrolling -- setting up a custom header for a Matrix Object grid.
- Matrix Object -- displaying a grid of items with a custom arrangement.
- Matrix Programming -- programming a Matrix object.
- Text List Appearance -- customizing the appearance of a Text List Object.
- Text List Constructor -- quickly creating a Text List Object from a template.
- Text List Database Integration -- synchronizing a Text List Object with a database.
- Text List Multiple Columns -- displaying multiple columns in a Text List Object
- Text List Object -- displaying a grid of text.
- Text List Programming -- programming a Text List Object.
- Text List Searching -- searching within a Text List Object.
- Text List Selection -- selecting items in a Text List Object.
History
| Version | Status | Notes |
| 10.0 | New | New in this version. |