Previous: 203: Creating a Data Entry Form
It’s easy to add a push button to a form — simply drag a button from the Object Library. Then switch to the Special Object Properties panel of the Object Inspector Panel and set the button name to whatever you want (you may need to adjust the width of the button to accomodate the name).
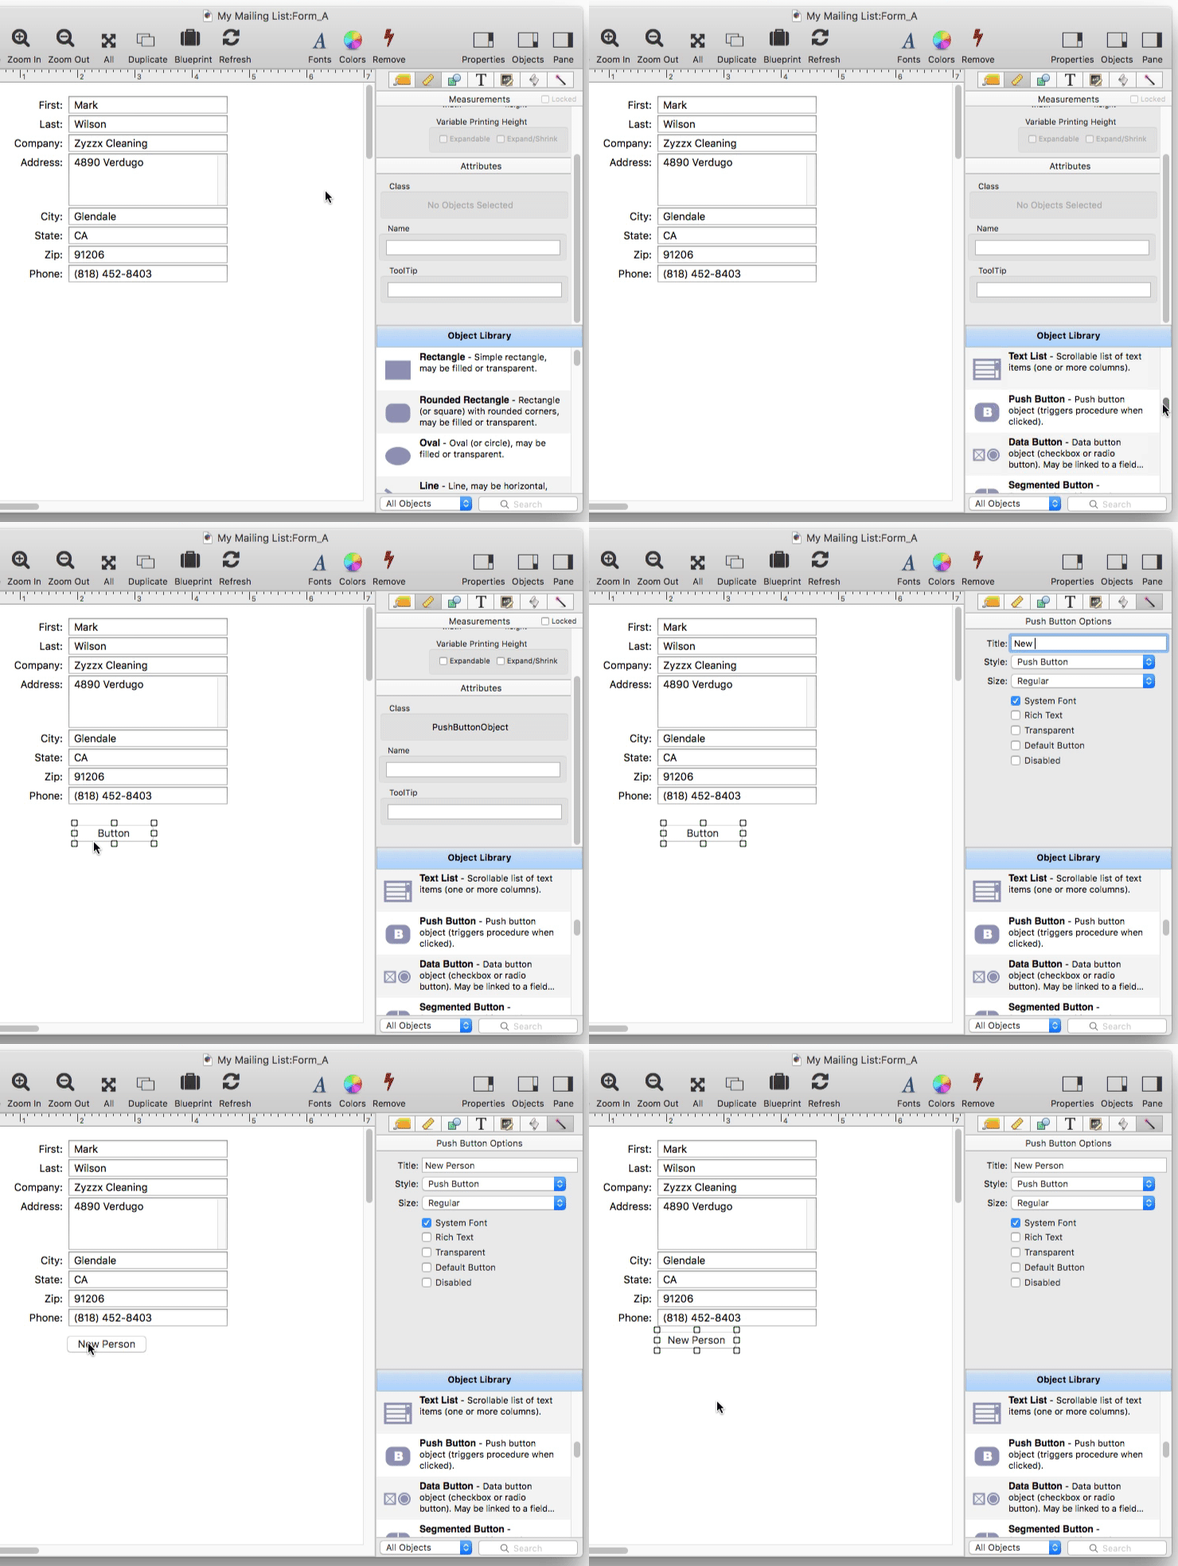
The new button doesn’t do anything yet — it needs code. In this case the button is supposed to add a new record, so switch to the Code panel (see Form Object Code) and type in addrecord.
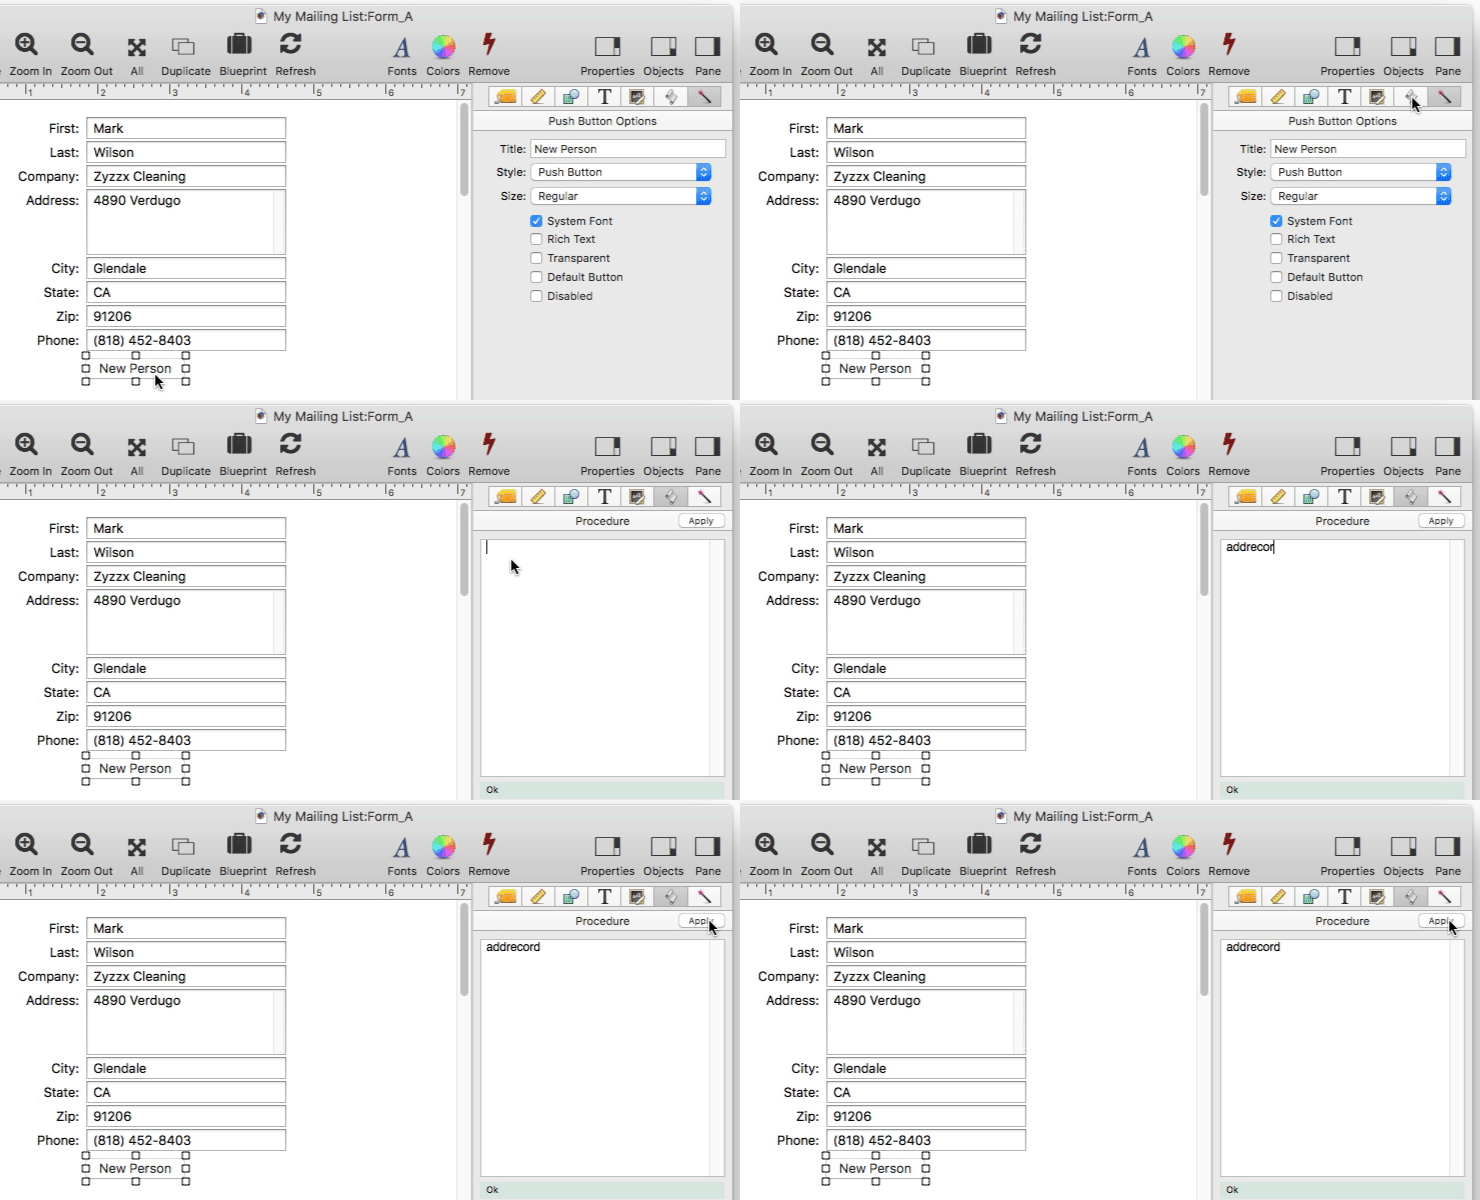
The button is ready to go, let’s switch to data mode and try it out.
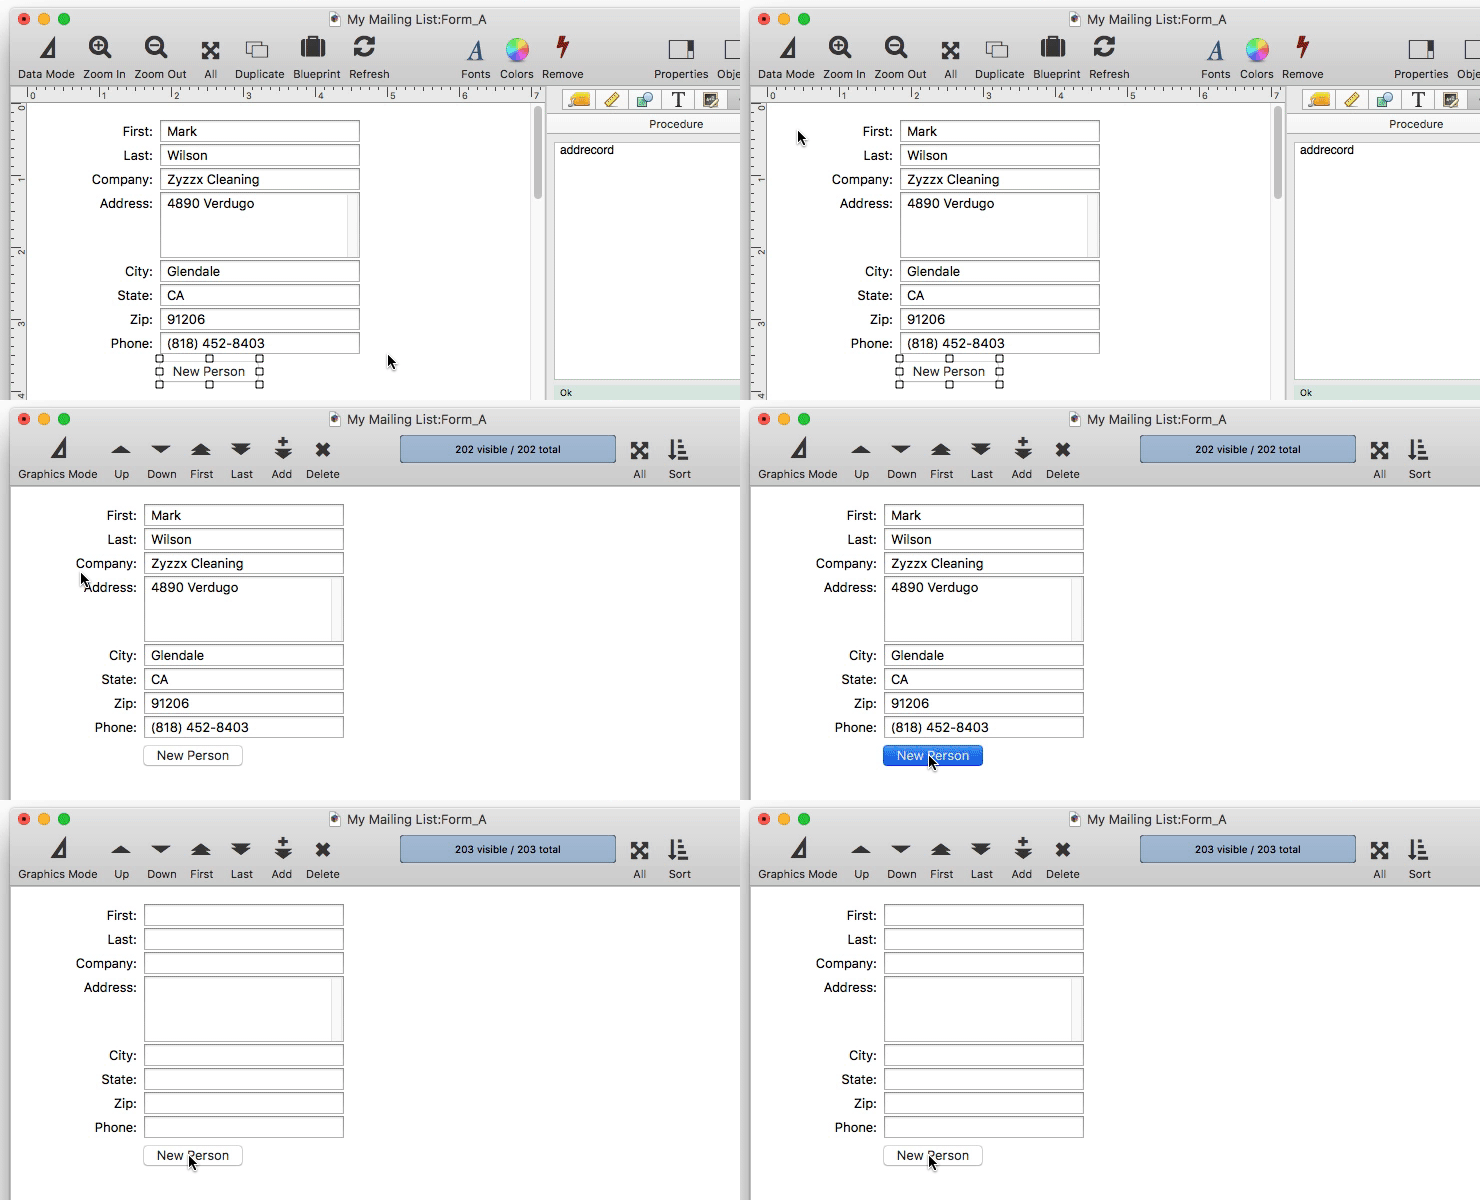
To learn more see Push Button Object.
Calling a Named Procedure From a Button
If you’ve already written a procedure that performs the task the button needs to do, you can call that procedure from within the button. In other words, instead of copying all of the code into the button, you just include one line of code in the button that calls the procedure by name.
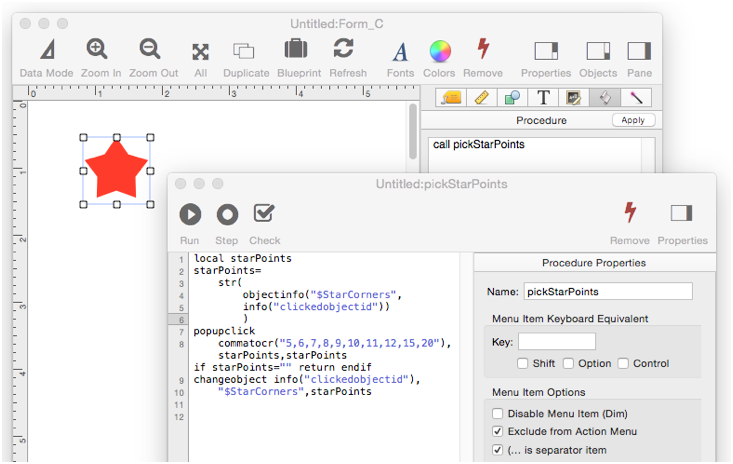
With the code in a separate procedure, it’s easier to make changes on-the-fly since you don’t have to go into Graphics Mode to make each change. To learn more, see Using External Code in Form Object Code.
Making an Icon Button
For a bit more flair you can add icon buttons to your form. Panorama includes the open source Font Awesome icon font, which contains hundreds of ready to use icons. The Font Awesome Wizard makes it easy to create a button with any of these icons. Open this wizard from the Help menu, then search for the icon you want.
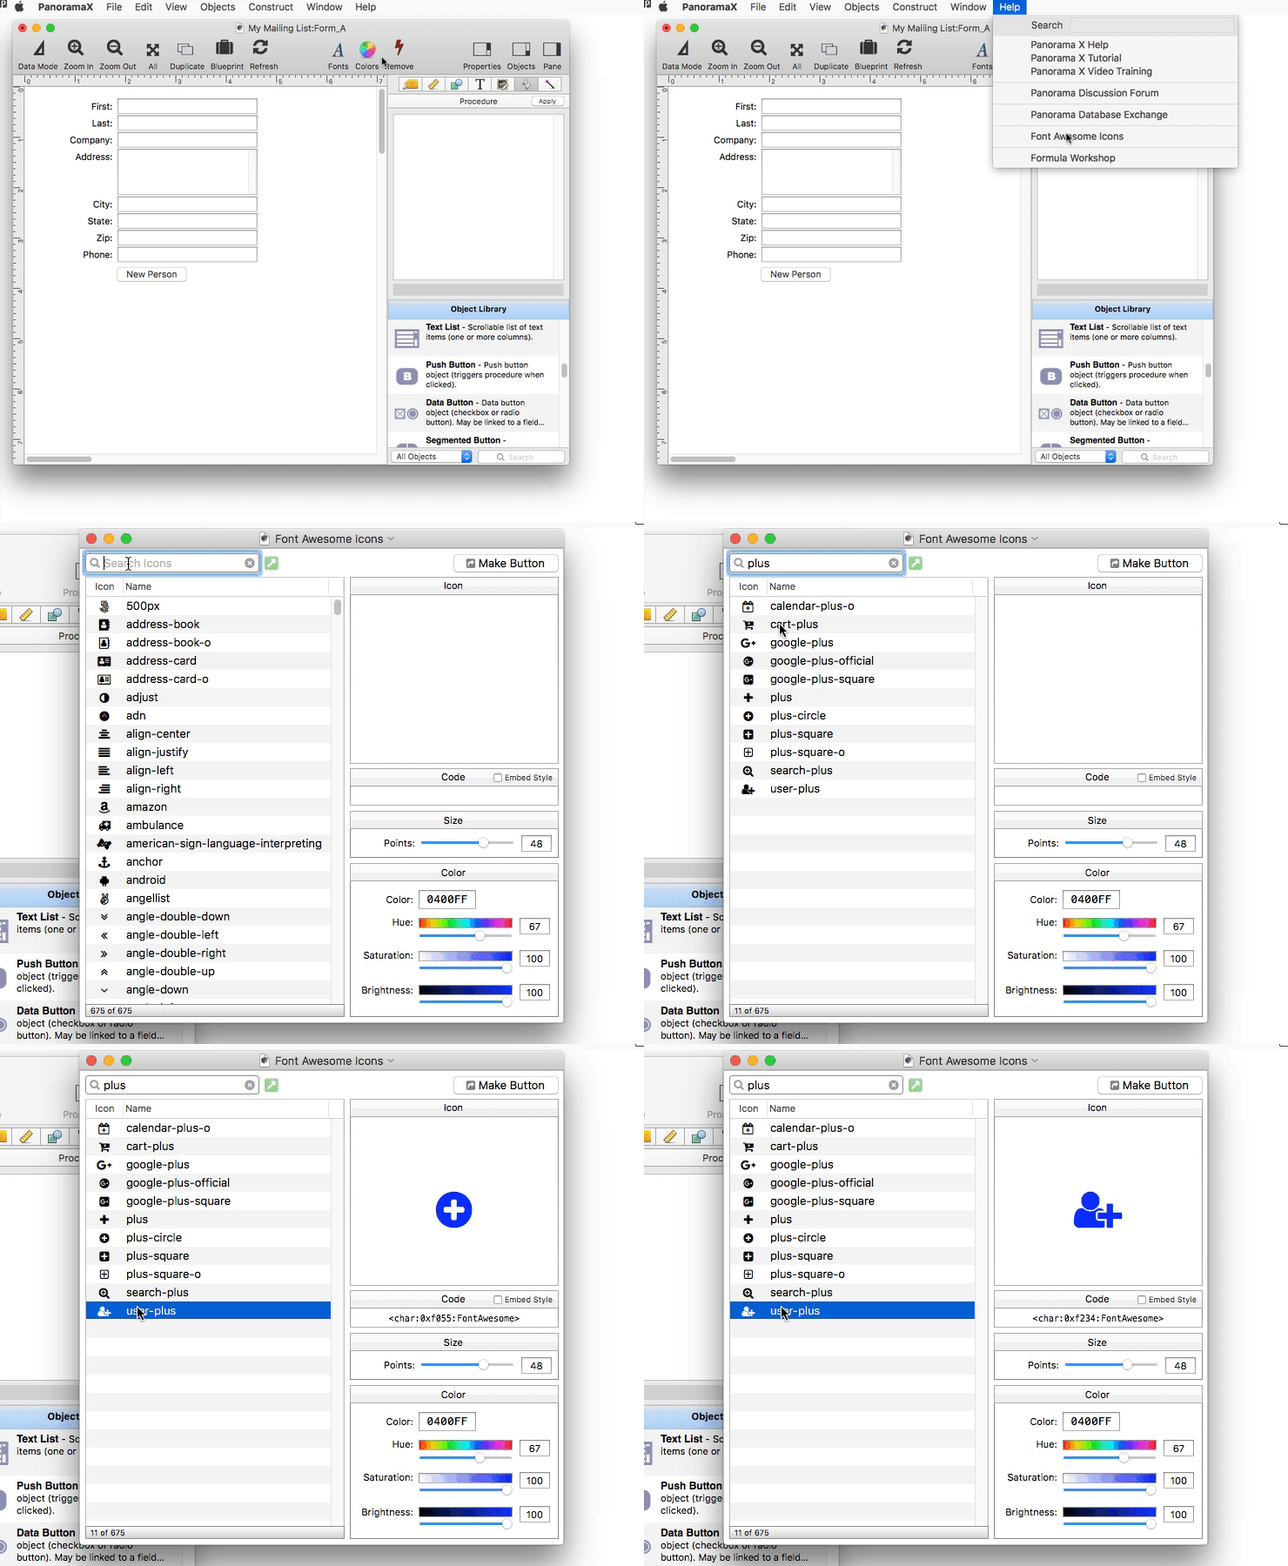
Since these icons are vector art, you can use them in any size and they’ll be super sharp, even on a retina display.
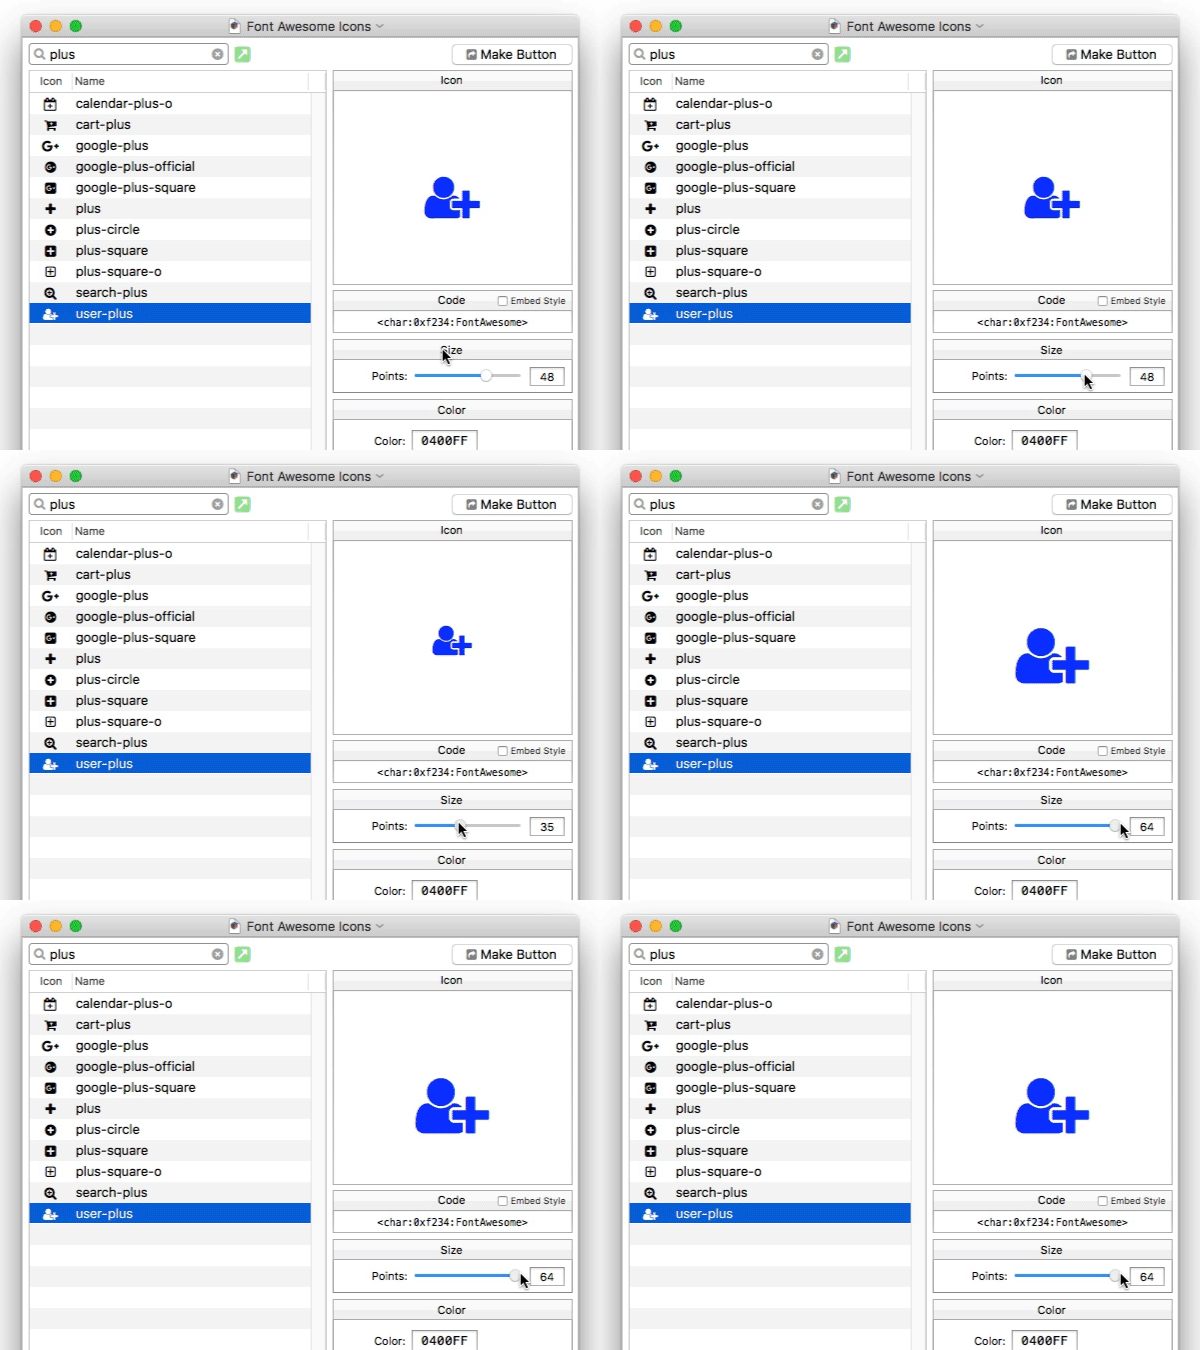
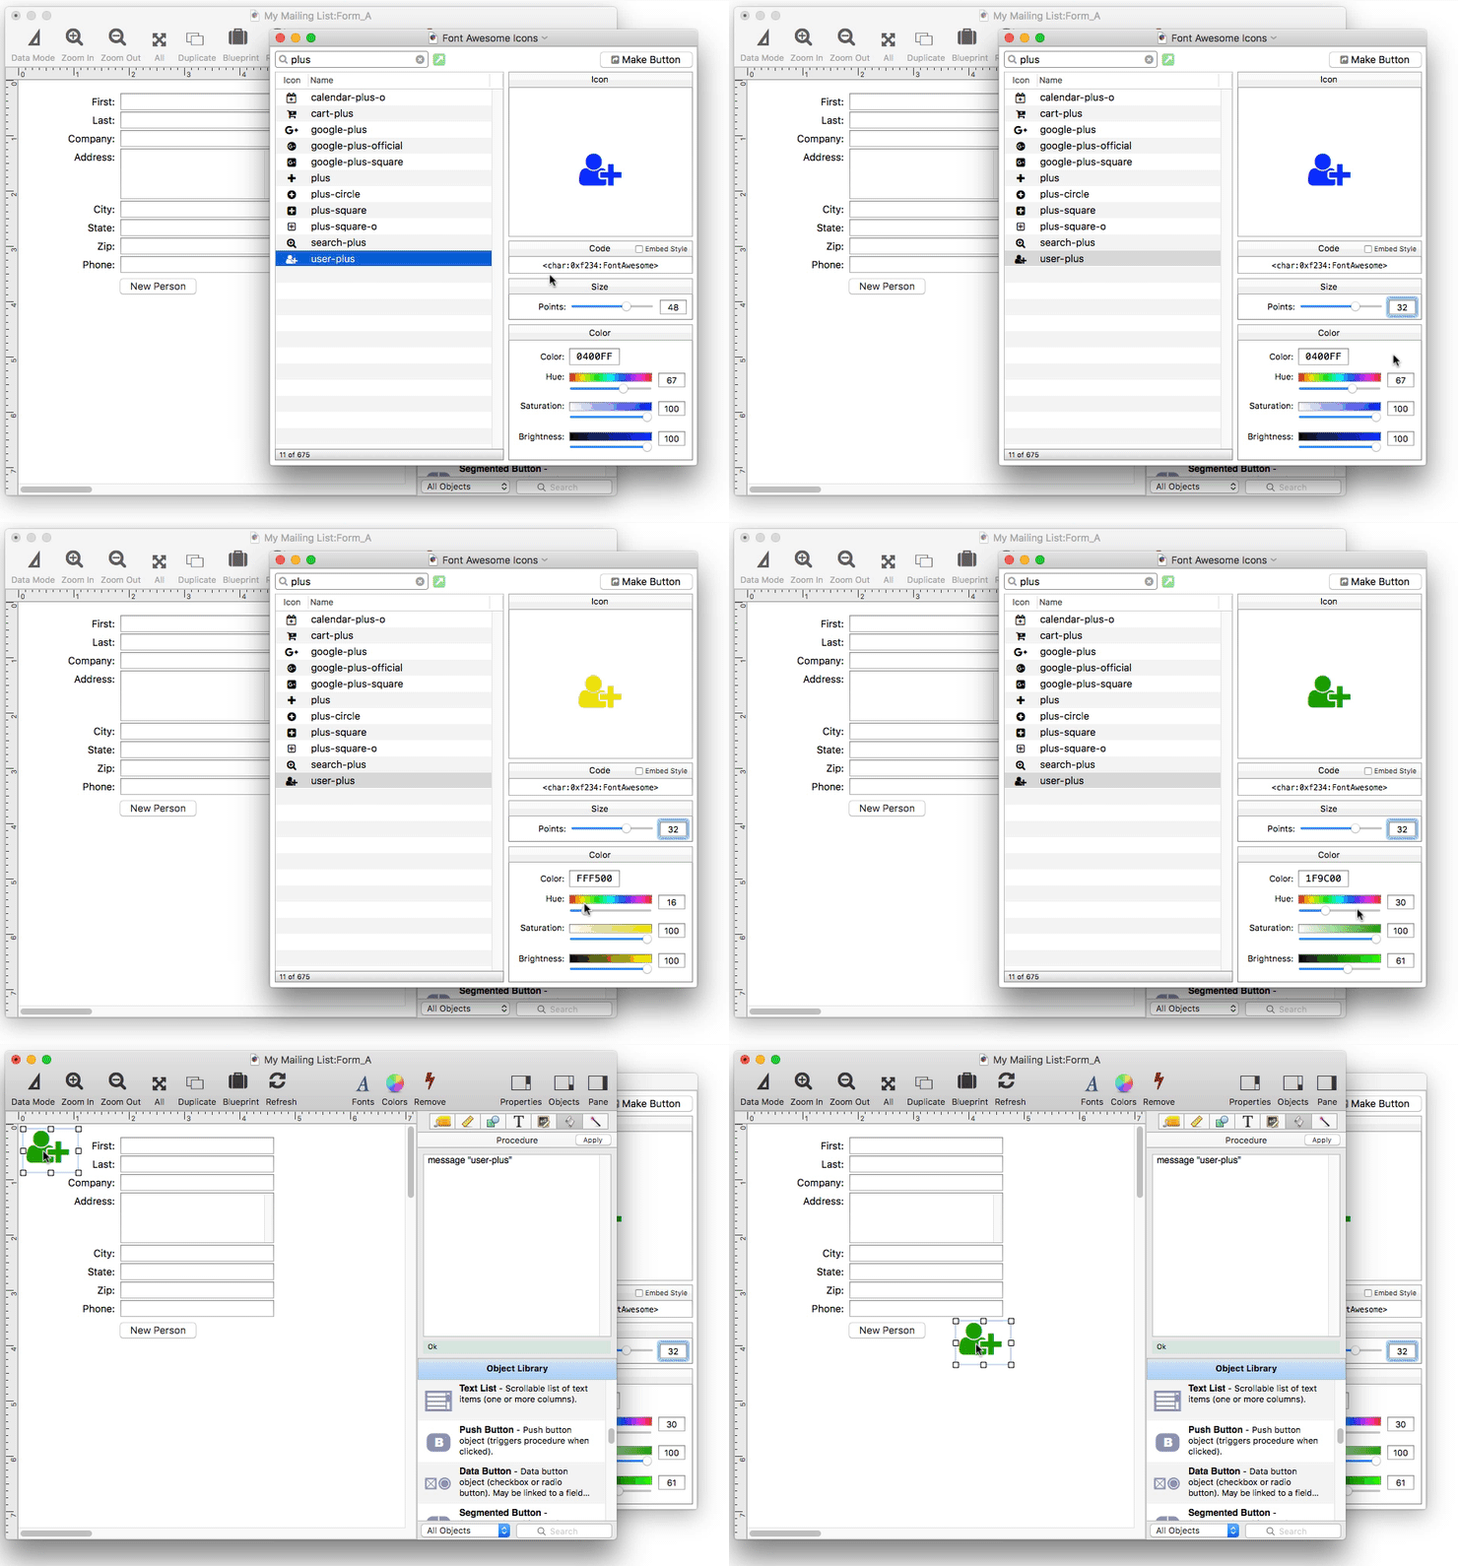
Pick the size and color you want, then press the Make Button button. Drag the new button into place where you want it.
Just like the push button, you’ll need to add code. In this case, I’ll make this button add a new record, and I’ll delete the push button I created earlier.
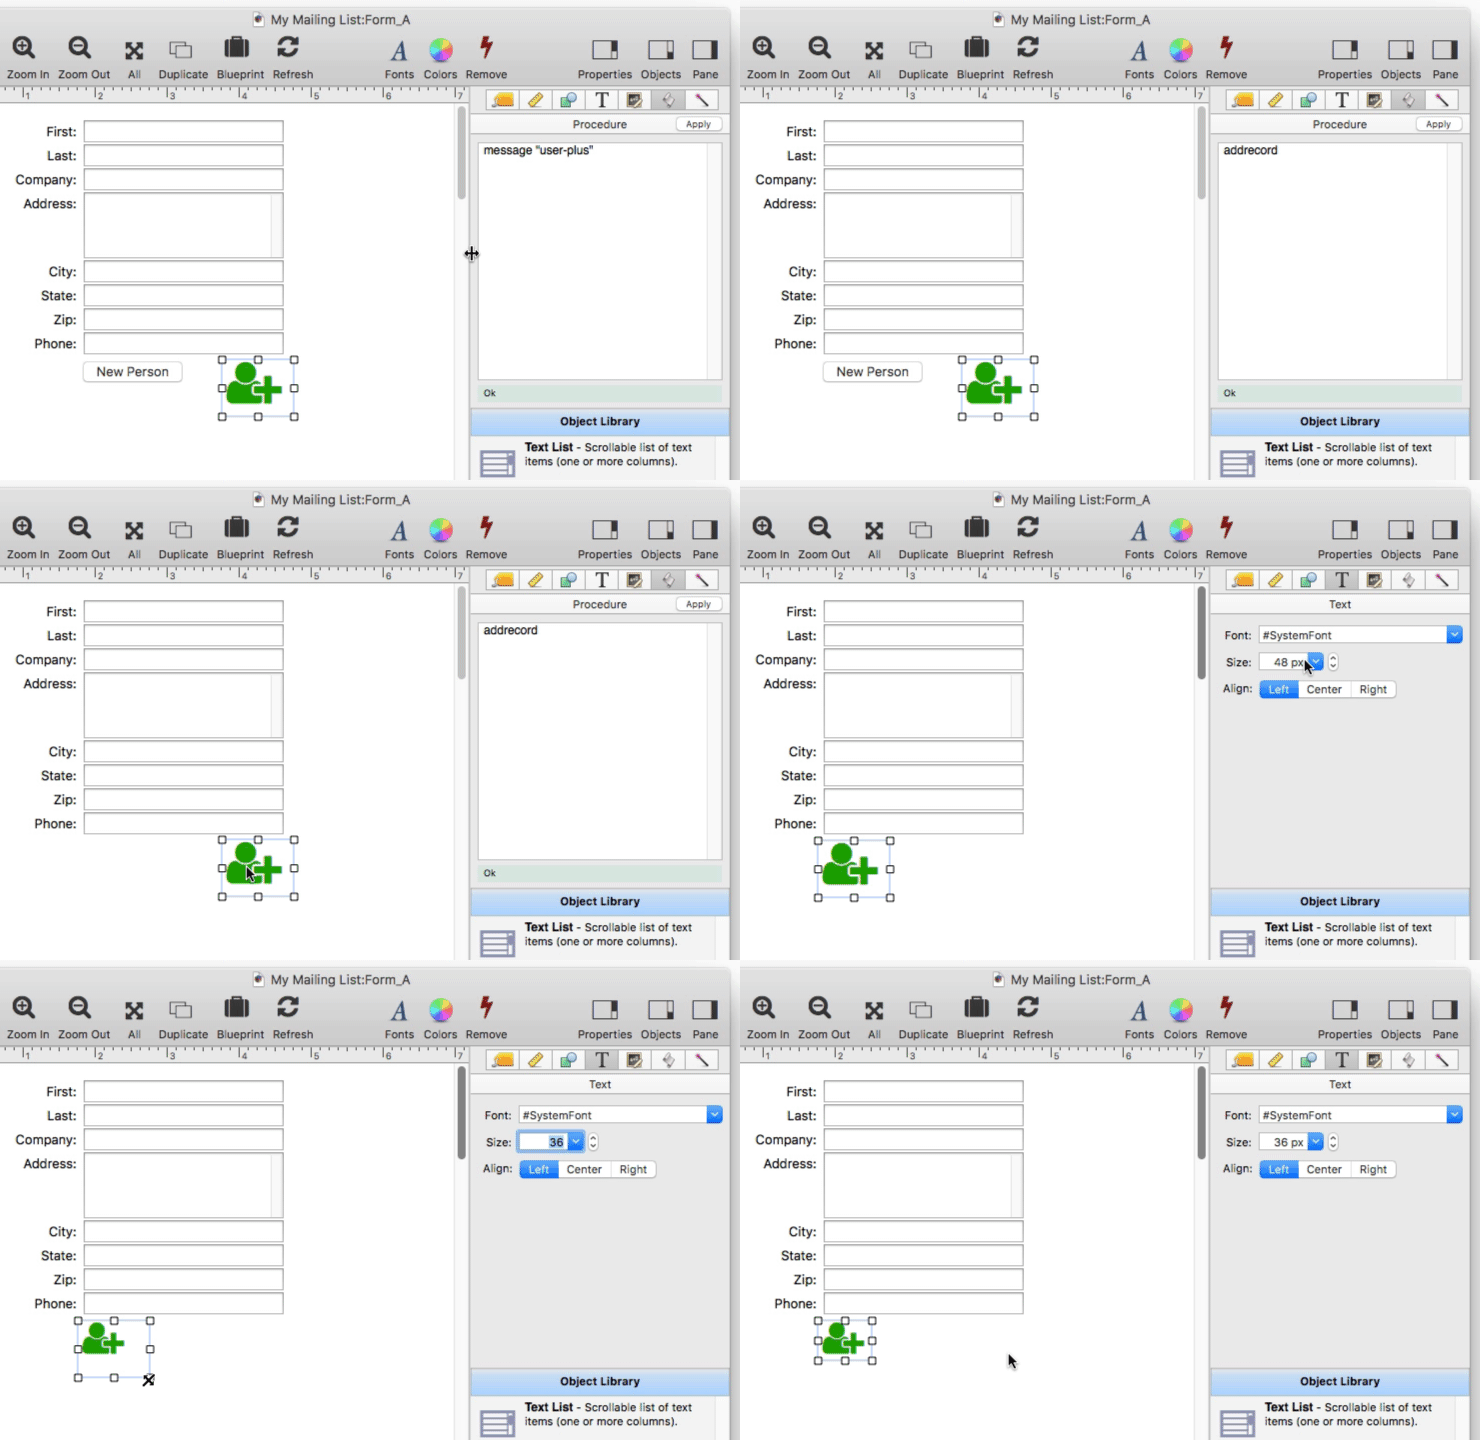
When I press this icon, a new record is added to the database. To learn more about creating icon buttons, see Font Awesome Icons.
Making an Image Button
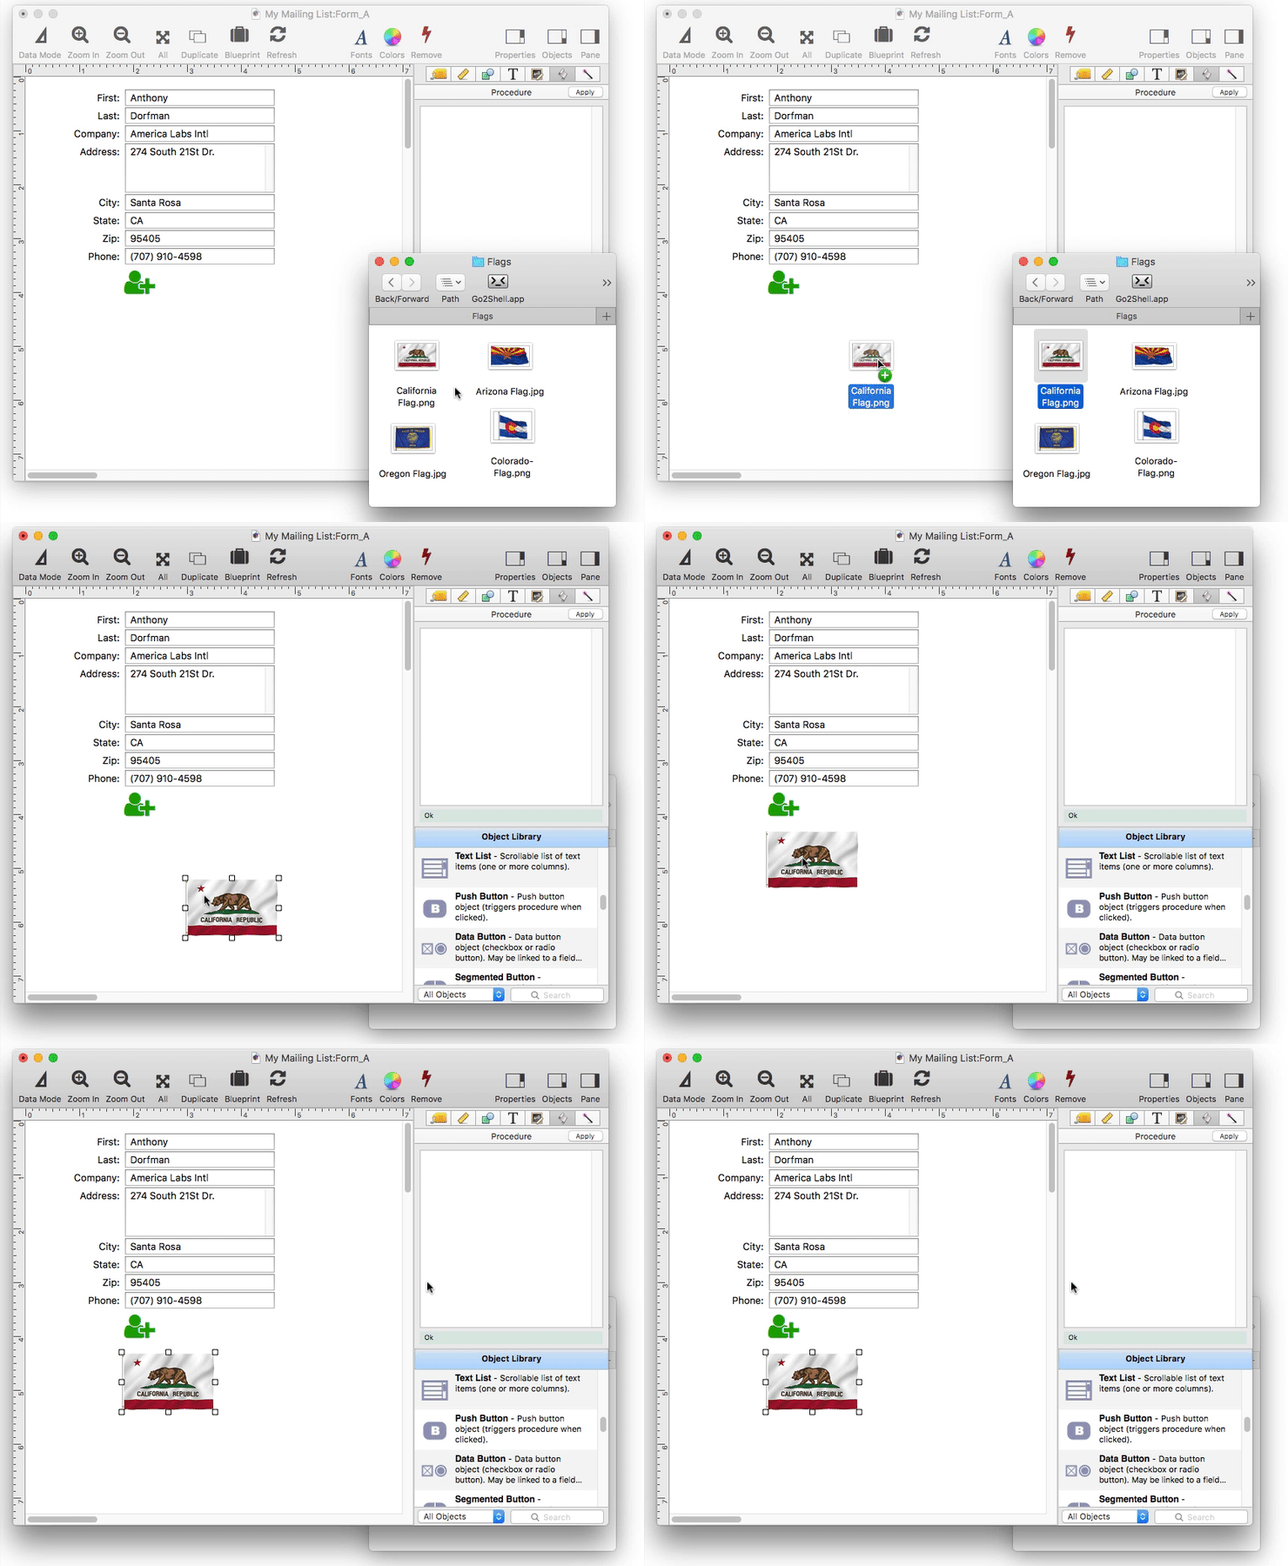
To add an image to a Panorama form, just drag it from the Finder on to the form.
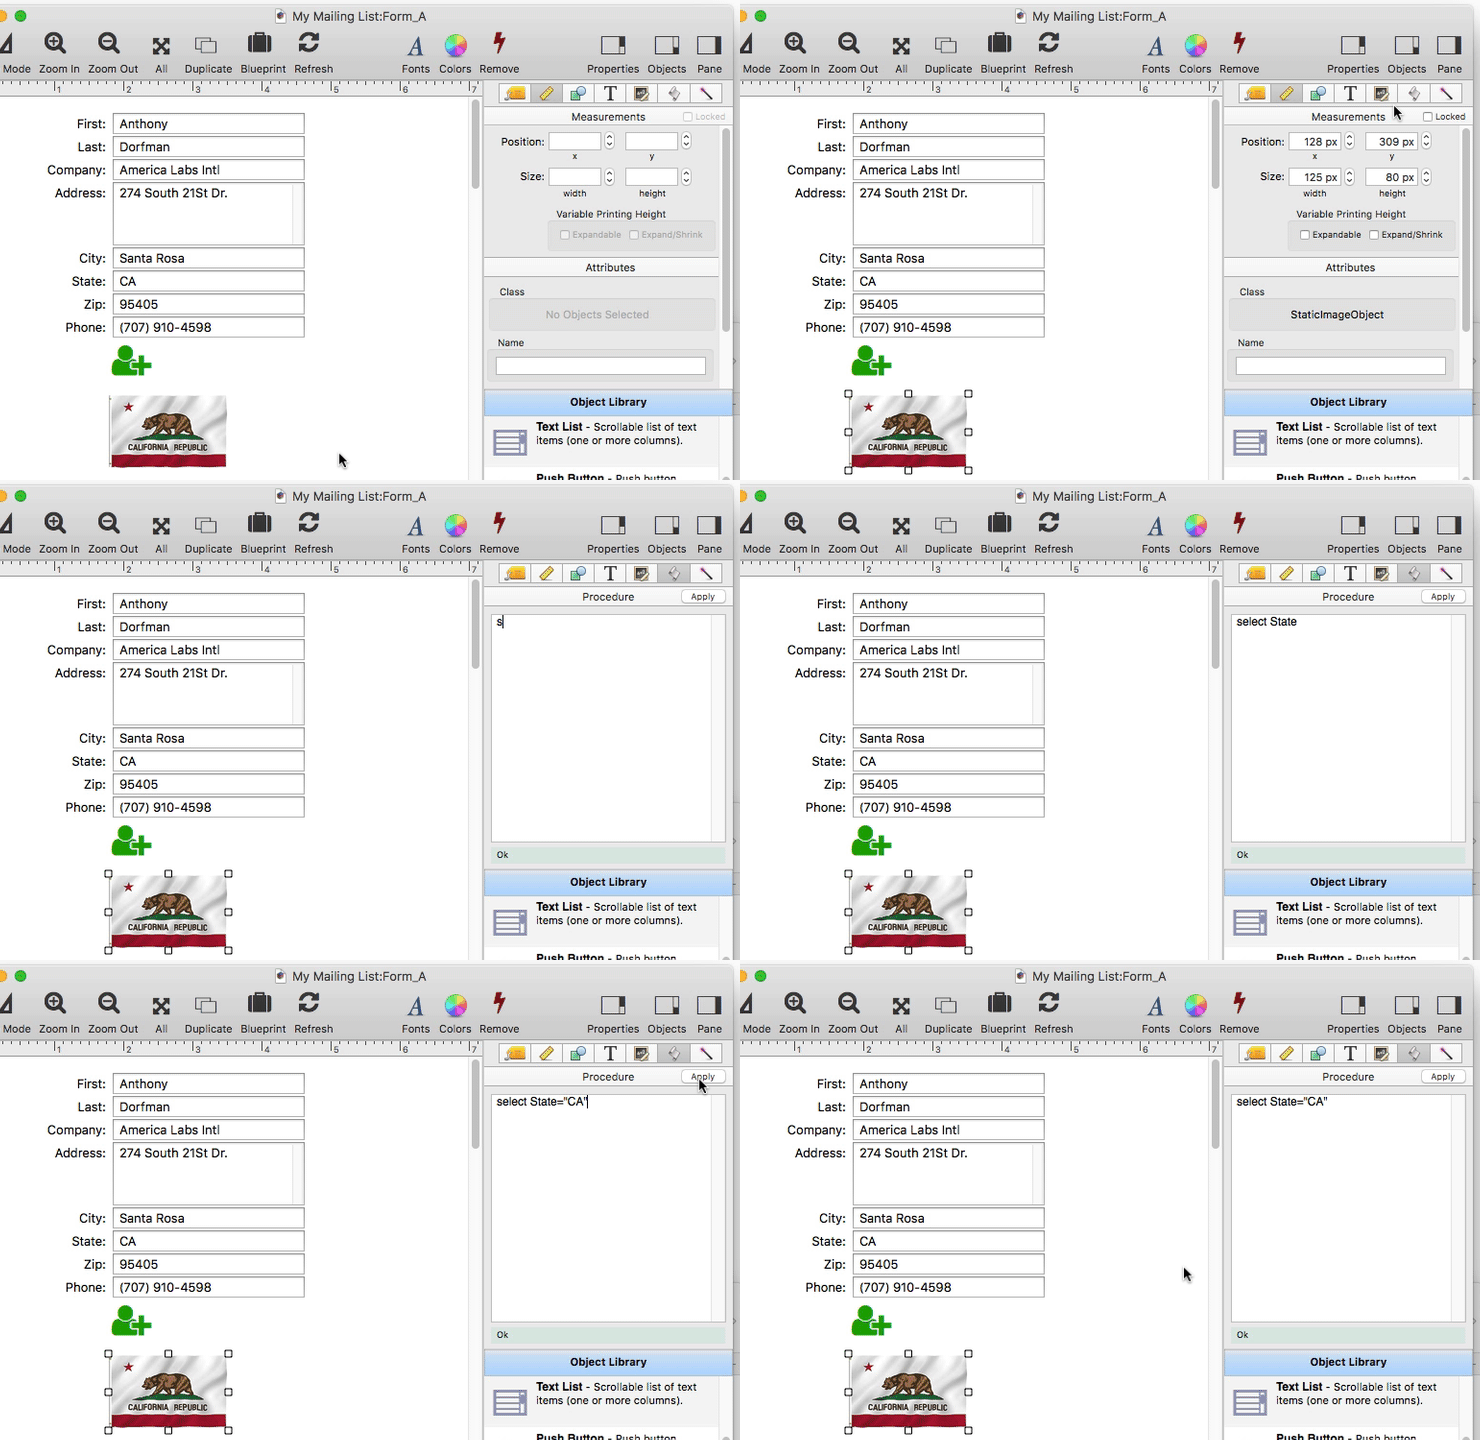
To make this object (or any object, for that matter) into a button, just add code. In this case, I’ve added code to select addresses in California. I’ve typed this code in manually, but I could also use the procedure recorder, then copy and paste the code into the object (see Procedure Recorder).
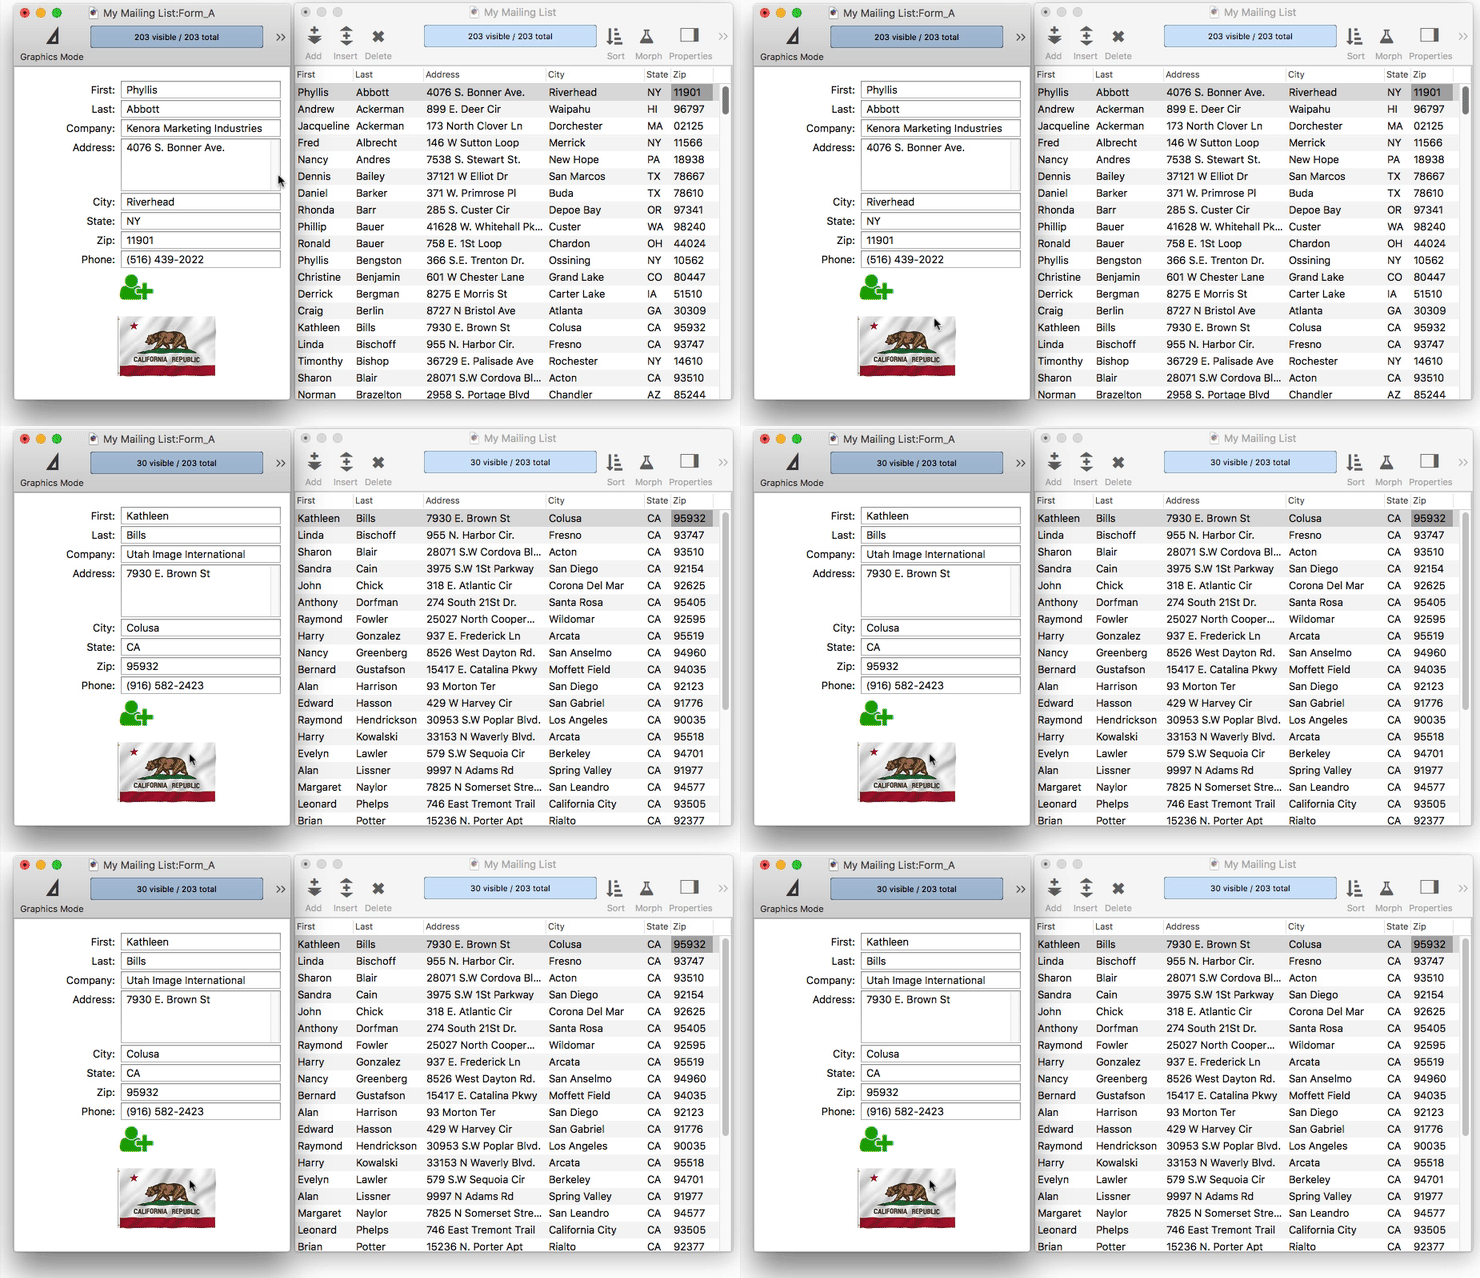
When I go to Data Mode and click on the flag, the California records are selected. To make it easier to see what is going on, I’ve positioned the data sheet window next to the form (see View Menu).
To learn more about displaying images in Panorama, see Fixed Image Object and Image Display Object.
Next: 205: Printing Mailing Labels
See Also
- addrecord -- adds a new record at the end of the current database.
- call -- allows a procedure to call a separate procedure within the current database as a subroutine.
- Fixed Image Object -- is used for fixed images (images that never change).
- Font Awesome Icons -- are over 600 ready-made icons built right into Panorama.
- Form Object Code -- associating programming code with an object
- Graphics Mode -- is used to edit the graphic design of a form.
- Image Display Object -- is used for dynamic images (images that change depending on the data).
- Object Inspector Panel -- is used to view and modify the attributes of selected objects in a form.
- Object Library -- is used to create new objects in a form.
- Procedure Recorder -- recording database actions as code.
- Push Button Object -- triggers a procedure when it is pushed.
- View Menu -- accessing and creating the data sheet, forms and procedures.
History
| Version | Status | Notes |
| 10.0 | Updated | Carried over from Panorama 6.0, with updates. |